So you want to get started generating images, but where do you even start? And everyone does something different and it feels impossible to find a good starting point. Well at least that's how I felt starting out. And hopefully this guide will help with that. I'm gonna have to assume you know how to install software and have a working computer with a decent graphics card. Otherwise to go over the setup of all of that, this guide would be way to long.
To start with the software you need, I like SwarmUI personally, there is also sd-webui-forge, and there is ComfyUI as well, but if you're just starting out I'd not get into ComfyUI just yet, it just adds another layer of complexity on top of an already complex thing. Whichever you choose to use though is fine, the settings and starting prompt stuff is basically the same regardless.
For this guide we'll be making a basic workflow you can follow to get started. I'll be using nova-furry-xl as a good starting baseline furry model. You can find more models at civitai or similar sites. Once you have your software of choice loaded up you get this blank prompt box and no idea what to do next, which is like daunting I know. But here is the basic idea around generating images. The entire process ends up just being these steps.
One important thing to remember starting out is to change one thing at a time so when it looks off you can get a much better understanding of what caused it. You're not telling it exactly what to 'draw', you're guiding it towards an idea and adjusting it until you get there.
- Write starting prompt
- Generate an image
- Notice what is wrong or what you want to change
- Adjust one thing, your prompt, a setting, like CFG or Steps
- Repeat that process until you get something you like
This here is literally the entire process. Everything else just helps you understand what to change and why.
Here is a sample prompt we can use to try this out. If you're like me and sometimes struggle to come up with what you want. Settings wise we'll be using these. I'll explain more about them later on.
- Steps: 35
- CFG: 7
- Sampler: Euler Ancestral
shark girl with pink hair and blue eyes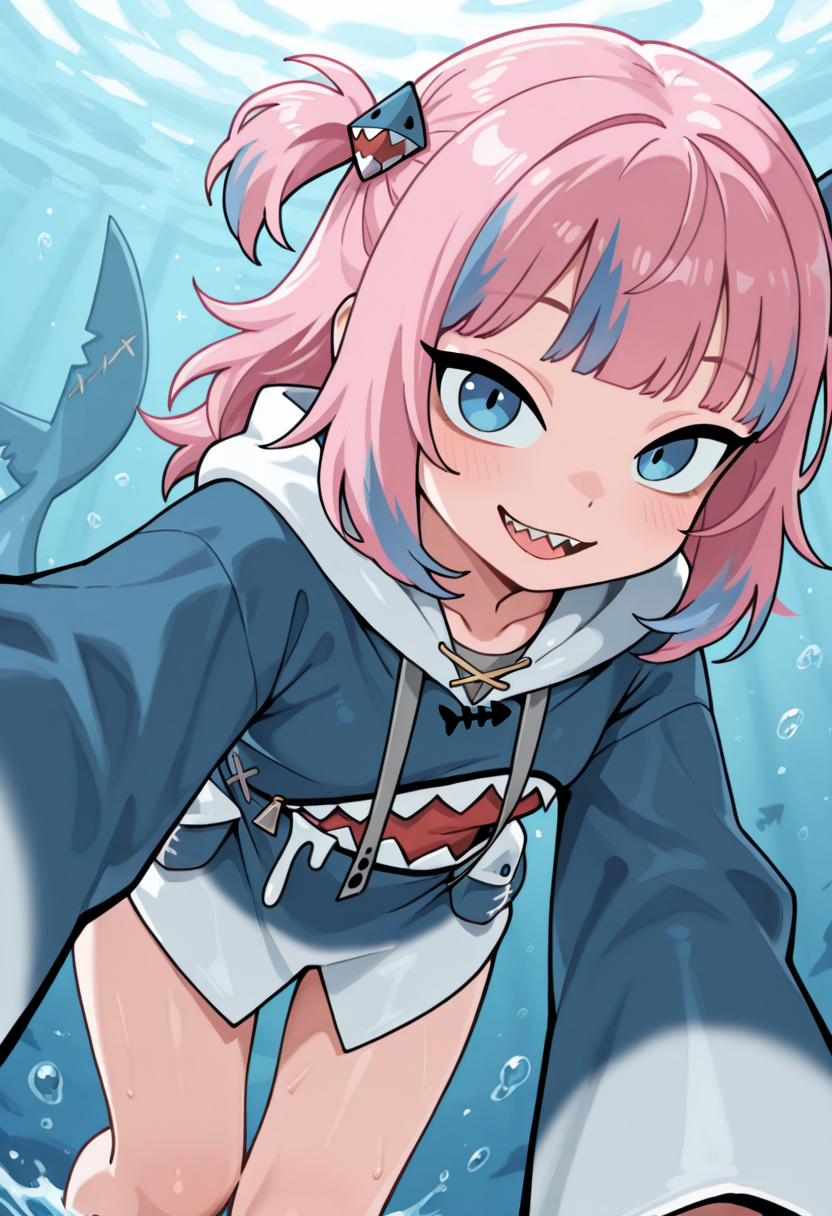
So you made your first image but it probably isn't what you imagined at all. Don't worry, thats normal. Why is that though? Thats were we get into that, while furry and anime models do work with natural language type prompts, ie just saying what you want in a sentence like the above example. They're also trained with tags in mind, like the very tags from certain sites you probably already know well. And sometimes that alone works better for my brain. So lets try that instead.
anthro, shark, female, pink hair, blue eyes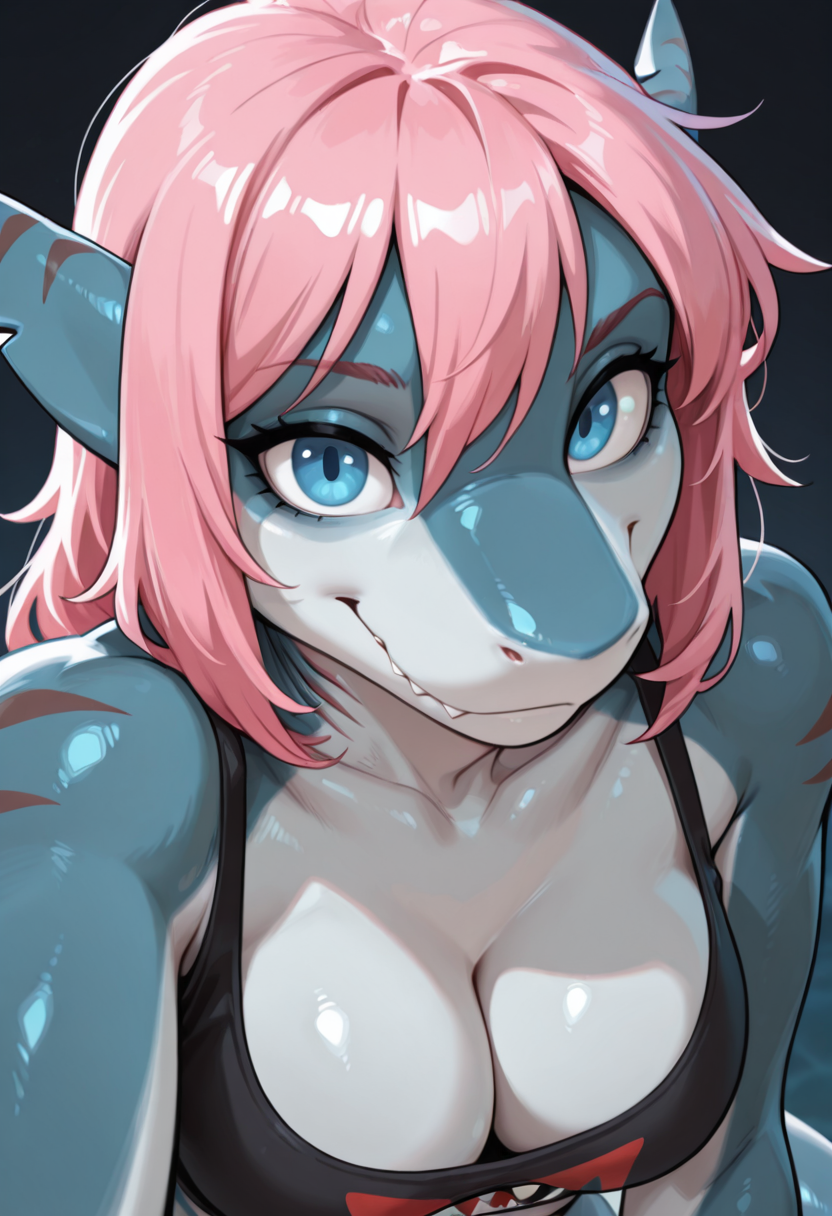
So now we now have the basic idea of making a simple prompt. The next step is thinking outward from that. Think like composition, ie what else do you want. What kind of background. What sort of setting speaks to you right now? a warm beach? some sunset? what kind of outfit? a swimsuit? time of day? what kind of character details do you what? This is where you mess around with your prompt and find out what words/tags work. You can find examples tags to try on sites like civitai or try booru tags which can help with inspiration. You'll usually notice right away words it understands and ones it doesn't, just through trial and error.
anthro, shark, female, pink hair, blue eyes, beach, sunset, swimsuit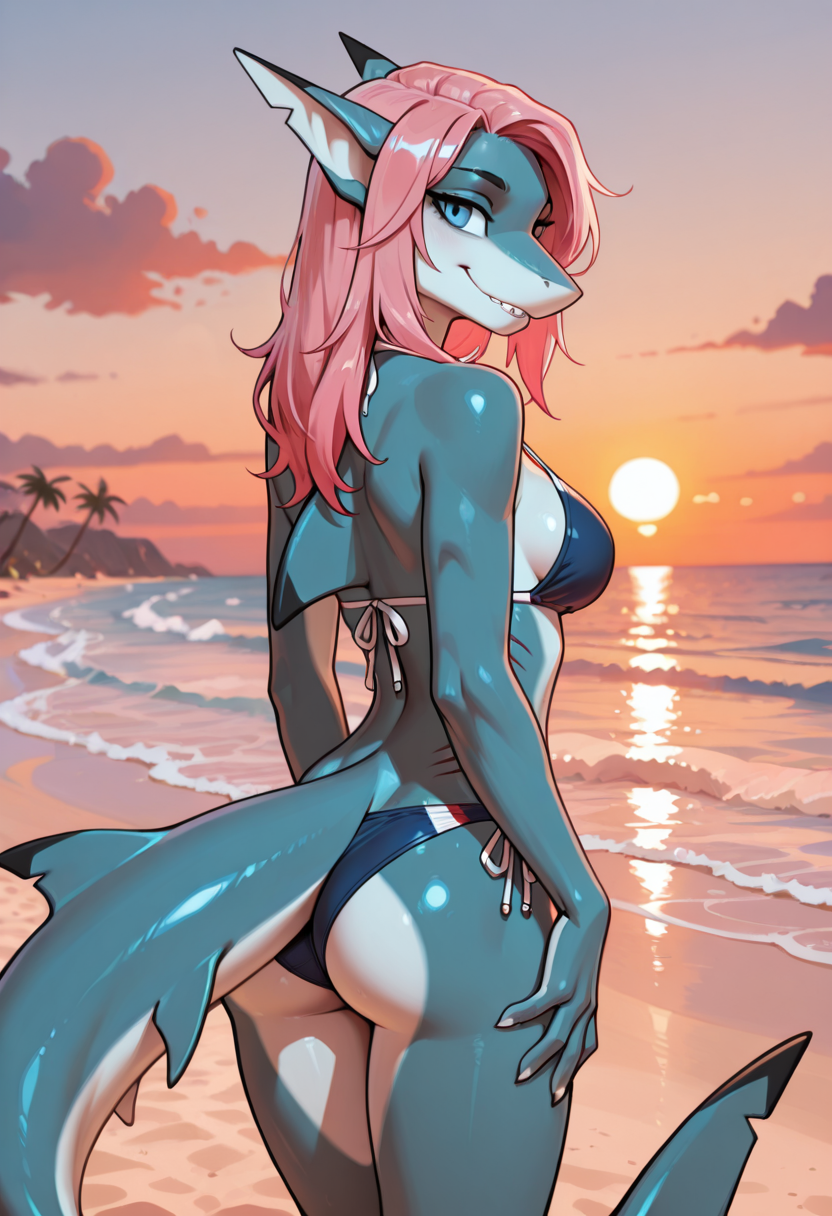
Another important bit of the prompt is the as I call them, quality tag spam, (which you'll see a lot in prompts), and people copy paste it blindly too. Which can work, but its important to take a moment and understand why we end up doing this when staring out, And that is because you're telling it to make the good stuff basically. Very similar to telling it what type of character or background you want. Its not strictly necessary, its more guiding the model towards good quality and detailed images. Its worth messing with and tweaking as you learn. If you want to see what it actually does try removing them and compare the difference. So now our full example prompt might look like.
masterpiece, best quality, detailed, amazing quality, very aesthetic, high resolution, ultra-detailed, absurdres, newest, details, highly detailed, dynamic, 8k, Ultra-HD, very awa, highres, detailed face, anthro, shark, female, pink hair, blue eyes, beach, sunset, swimsuit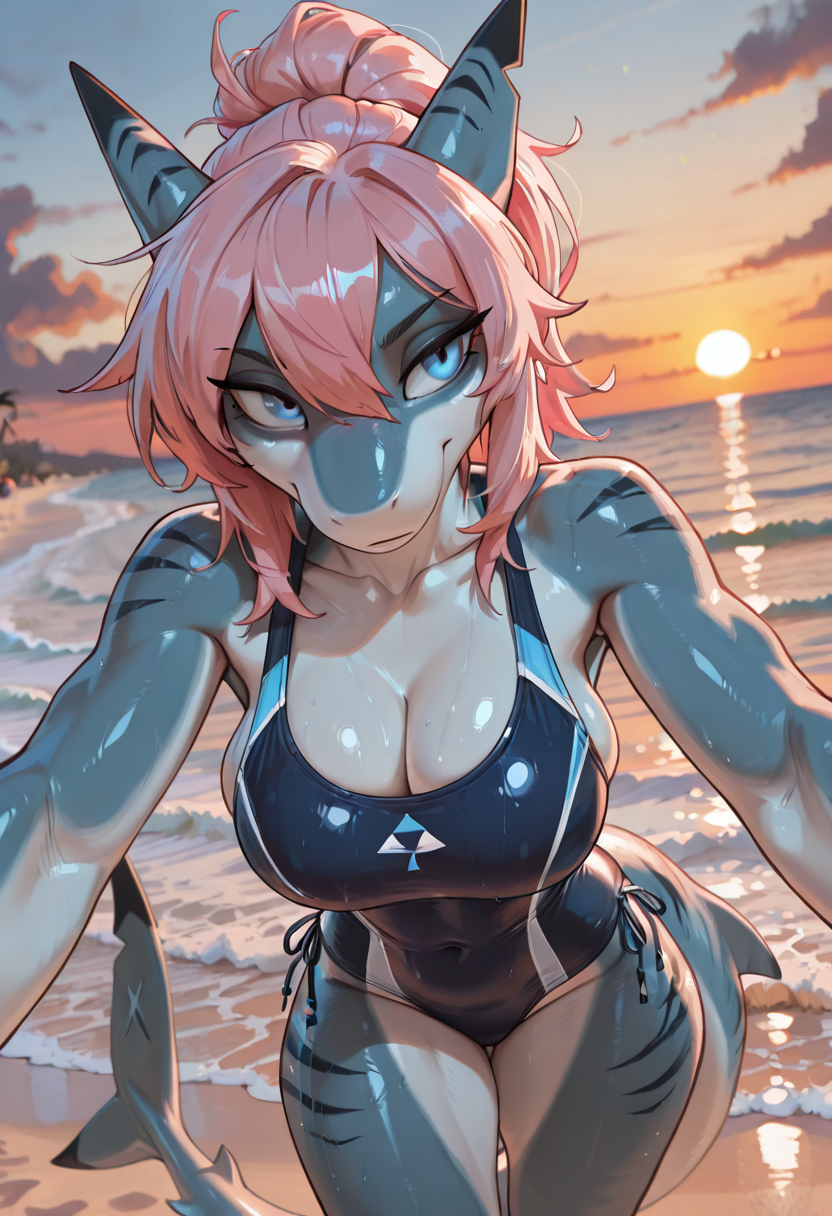
So we have a good starting point for a prompt and how to add to it, but what is the negative prompt for? Its basically like the opposite of the prompt, as in it tells the model what you want it to avoid doing, or pushing the model away from those concepts, for example I like to use a simple negative prompt, for example.
lowres, bad anatomy, signature, watermark, artist nameI usually leave it at that unless its doing something you don't want, then you can add the term for it in the negative prompt. One trap I think people fall into is using a huge negative prompt and wondering why things arn't working quite right. Its easier to figure out whats happening if you keep the negative prompt simple to start and only add things you keep seeing in your images you don't want.
As we get into the steps to mess with and tweak, its important to note that when starting out these can be really confusing. So start off changing one thing at a time. Generate an image. And see how it changed. It helps you get a better understanding of what each setting does and how it effects your images. Its very easy to get caught in the trap of changing a bunch of stuff at once and being lost as to why it is now weird or not doing what you wanted.
But other than adding more to the prompt what are the important settings to get a feel for first?
One is the steps, Steps are basically how many times it builds and then refines an image. More steps = better quality, but takes more time. I find a baseline of 35 to be good. You can go up to 40, but anything higher and you quickly get diminishing returns.
The next setting we can tweak is CFG, CFG is just how hard it tries to follow your prompt. Our baseline here in these examples is CFG 7. Most of the time you'll want to stick around there, in between 5 to 8 is a good baseline to start, but this is the setting you'll want to mess around with and see how it changes the images you generate. For illustrious models/nova furry. CFG 5 - 7 ish, is around where the model was trained on. If you want to see what a models recommended settings are, you can usually find those on the models page, like on civitai.
If you use a lower CFG, it will follow your prompt less. Which can be fun for more creative results or inspiration. If you go too high it will end up baking the image basically as it follows the prompt too hard. If you want to see an example of this just crank the CFG as high as it will go and try it.
Resolution is pretty self explanatory but it does effect composition of the images you generate to a degree since it will try to fill in the selected resolution with your prompt, something to keep in mind as I've noticed it will struggle sometimes with certain poses at certain image aspect ratios.
The next thing to mess with is sampler, but like what is that? The sampler is sorta like the way it follows the random noise to get to the image the prompt is asking for, some samplers to try messing with are Euler Ancestral, or sometimes called Euler A, it adds random noise in between each step, giving a bit more variation which can be nice for more dynamic images. Another stable baseline is DPM++ 2M.
Steps and samplers are a bit more complicated than this, but for the sake of this being a getting started beginner guide, I try to just give the basic enough understanding to get started with.
If you're unsure what a setting does try pushing it too far and see what breaks.
Hopefully you found this helpful to get started and past the what do I even do stage. From here you might make a bunch of images, mess around with the settings above. Maybe try some different illustrious based furry models. And if you have any questions feel free to ask.